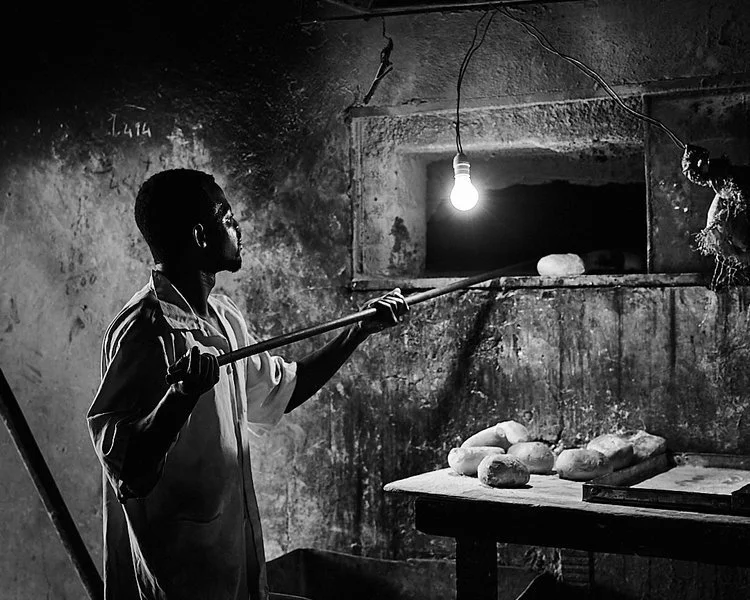
The Monochrome Method
Discover the power of light, shadow, and form in your photography.
The Monochrome Method is a self guided, hands on course designed to help photographers of all levels develop mastery in black and white photography. Through 8 carefully structured Phases, you’ll learn to see the world differently, craft compelling images, and create a cohesive portfolio that reflects your unique vision.
-
Intro
-
Phase 1
-
Phase 1
Learn to rewire your vision for black and white. This phase helps you move past color and notice light, shadow, shape, and texture as your primary subjects. You’ll train your eye through simple observation and exercises that focus on seeing tonality and simplifying your frames.
-
Lesson 1: Why Black & White?
Explore how removing color shifts focus to light, form, and emotion. Understand why monochrome is timeless and expressive.
-
Lesson 2: Training Your Eye to See Light, Form, and Texture
Learn to identify shapes, shadows, and textures in everyday scenes. Practice seeing tonal contrasts rather than colors.
-
Lesson 3: Simplicity and Focus
This lesson teaches students to strip their images down to the essentials. By removing visual clutter and distractions, they allow the subject to take center stage and create stronger, more intentional photographs.
-
Assignment 1: Everyday Objects Study
Photograph five objects around you, emphasizing form, texture, and contrast over color. Capture the essence, not the object.
-
Assignment 2: Light Hunt
Spend 15 minutes seeking interesting light and shadows in your environment. Capture at least 10 frames where light is the main subject.
-
-
Phase 2
-
Phase 2
Dive deeper into the behavior of light. Discover how hard vs. soft light affects mood, how shadows can be used as compositional tools, and how to make creative exposure choices. This phase develops your ability to read a scene and control how bright or dark your images feel.
-
Lesson 1: Hard vs. Soft Light
Discover how light quality changes mood and texture. Learn to use both hard and soft light to enhance your images.
-
Lesson 2: The Power of Shadows
Understand shadows as a storytelling tool. Explore shape, pattern, and contrast to create depth and intrigue.
-
Lesson 3: Dynamic Range & Exposure in Monochrome
Learn how to control the full tonal spectrum, balancing highlights and shadows for dramatic or subtle effect.
-
Assignment 1: Shadow Patterns
Capture five images where shadows are the main focus. Explore geometric and organic shapes created by light.
-
Assignment 2: Hard vs. Soft Light Study
Photograph one subject twice, once in hard light and once in soft light. Compare the differences in mood, texture, and contrast.
-
-
Phase 3
-
Phase 3
Composition becomes your superpower. Learn to use leading lines, geometry, balance, and negative space to guide the viewer’s eye and give your images structure. Minimalism and simplicity take center stage to make your work more impactful and intentional.
-
Lesson 1: Leading Lines, Shapes, and Geometry
Use lines and geometric shapes to guide the viewer’s eye and strengthen your compositions.
-
Lesson 2: Balance and Negative Space
Learn how positive and negative space interact to create harmony and visual interest.
-
Lesson 3: Minimalism in Monochrome
Simplify your images to focus on essentials — form, light, and texture — for strong, clean compositions.
-
Assignment 1: Leading Lines & Shapes Study
Capture 3–5 images emphasizing lines and geometric forms from creative angles.
-
Assignment 2: Negative Space & Minimalism Challenge
Create 3–5 minimalist photos where empty space enhances the subject and mood.
-
-
Phase 4
-
Phase 4
Shape the emotional tone of your images by controlling brightness, darkness, and contrast. Explore high-key and low-key photography, learn to think in tonal zones, and use contrast to heighten drama or create calm, quiet scenes.
-
Lesson 1: High Key vs. Low Key Photography
Learn to use bright and dark tones intentionally to convey mood and emotion.
-
Lesson 2: Using Contrast to Create Mood
Understand how tonal contrast emphasizes texture, form, and drama in your images.
-
Lesson 3: The Zone System Simplified
Apply a simplified version of the Zone System to control exposure and tonal balance.
-
Assignment 1: High Key vs. Low Key Study
Photograph one subject twice: once in high-key, once in low-key. Compare tonal effects on mood.
-
Assignment 2: Contrast Exploration
Shoot five scenes with high-contrast and low-contrast approaches. Analyze how contrast affects storytelling.
-
-
Phase 5
-
Phase 5
Get comfortable with your camera’s creative settings. Master aperture, shutter speed, ISO, and RAW shooting to achieve your desired depth, motion, and texture. Experiment with filters — physical and digital — to separate tones and create more dramatic images.
-
Lesson 1: Choosing the Right Camera Settings
Master aperture, shutter speed, and ISO to capture the desired depth, motion, and texture.
-
Lesson 2: RAW vs. JPEG in Monochrome Work
Learn why RAW files offer flexibility for tonal adjustments and full creative control.
-
Lesson 3: Using Filters (Digital & Physical)
Explore digital and physical filters to enhance contrast, mood, and detail in black and white photography.
-
Assignment 1: Camera Settings Exploration
Shoot a subject three times using different settings. Compare effects on depth, motion, and texture.
-
Assignment 2: Filter Experimentation
Experiment with filters on one scene to create two distinct interpretations emphasizing mood or tonal separation.
-
-
Phase 6
-
Phase 6
Learn to “finish” your images with intention. This phase covers converting color files to black and white with control, using dodging and burning to guide the eye, and deciding whether to edit for realism or mood. You’ll shape each photograph into its most expressive form.
-
Lesson 1: Converting Color to Black & White
Learn to transform color images into expressive black and white using selective tonal adjustments.
-
Lesson 2: Dodging, Burning & Tonal Adjustments
Use these techniques to guide the viewer’s eye, enhance texture, and shape the mood of your images.
-
Lesson 3: Editing for Mood vs. Realism
Decide whether to emphasize realism or emotion and apply post-processing to support your vision.
-
Assignment 1: Conversion Practice
Convert three color images to black and white, experimenting with tonal adjustments to enhance storytelling.
-
Assignment 2: Dodging & Burning Study
Apply dodging and burning to one image, creating two versions: subtle and dramatic. Compare effects on mood.
-
-
Phase 7
-
Phase 7
Go beyond technical mastery and start building a personal style. Explore emotion, symbolism, and narrative in your work. Experiment with abstraction and unconventional approaches to discover what resonates with you and makes your work uniquely yours.
-
Lesson 1: Finding Your Voice in Black & White
Discover your personal style by exploring subjects, compositions, and themes that resonate with you.
-
Lesson 2: Emotion, Symbolism, and Narrative
Use tonal contrast, composition, and symbolic elements to tell stories and evoke emotion.
-
Lesson 3: Abstraction & Experimentation
Push boundaries with creative experimentation to develop a unique photographic approach.
-
Assignment 1: Short Photo Story
Create a 3–5 image story in black and white, using composition and tonal choices to convey narrative.
-
Assignment 2: Style Exploration
Shoot 5–7 images exploring a specific stylistic approach. Identify which elements best express your vision.
-
-
Phase 8
-
Phase 8
Turn your collection of images into a cohesive body of work. Learn to curate ruthlessly, sequence images for flow, and present them professionally — in print, online, or both. This phase prepares you to share your photography with confidence.
-
Lesson 1: Curating Work
Select only your strongest images to create a cohesive and impactful portfolio.
-
Lesson 2: Sequencing & Presentation
Arrange images in a flow that guides the viewer and highlights your best work.
-
Lesson 3: Printing & Sharing Online
Learn to present your work professionally in print and online while maintaining visual impact.
-
Assignment 1: Portfolio Curation
Choose 10–12 images from the course, curate them, and sequence them to tell a cohesive story.
-
Assignment 2: Presentation Experiment
Present your curated portfolio digitally and in print. Compare how each format affects perception and impact.
-
What you’ll learn

-
Train your eye to notice light, shape, and texture in everyday life.

-
Learn camera settings, RAW shooting, and filters to capture your vision.

-
Understand hard and soft light, shadows, and tonal range to create mood.

-
Convert color to black & white, dodge and burn, and edit for mood.

-
Master leading lines, shapes, negative space, and minimalism.
-
Develop your personal voice, convey emotion, and experiment with abstraction.

-
Explore high-key, low-key, and contrast to control emotion and drama.

-
Curate, sequence, and present a polished body of work ready to share.
Course FAQ
-
Beginners wanting to develop strong photographic foundations in black and white.
Intermediate photographers seeking to refine style, composition, and tonal mastery.
Anyone passionate about visual storytelling and expressive imagery.
-
Self-Guided Learning – Move at your own pace, with clear Topics, actionable Assignments, and Takeaways in each Phase.
Practical Assignments – Each Phase includes two exercises to develop technical skill, creative vision, and storytelling ability.
Inspiration & Guidance – Learn to see like the masters and find your own photographic voice.
Portfolio-Ready – By the end of the course, you’ll have a curated set of images ready for online sharing, print, or exhibition.
-
You will:
See the world in terms of light, shadow, and form.
Compose images that are intentional, dramatic, and emotive.
Master tonal control, contrast, and post-processing techniques.
Develop a personal style and a professional-quality monochrome portfolio.